
refining rods
Collaborating with goldsmiths to craft velvet rods.
The 0,5mm bit I ordered didn’t give me the precision and control I was looking for in the velvet rods, so I turned to colleagues at the Goldschmiede department of the Deutsches Technikmuseum.

The system I built at the studio for creating velvet rods worked only on a larger diameter brass rod – once I scaled down to a narrower diameter of rod, I couldn’t get consistent results.
The goldsmith department at the Deutsches Technikmuseum does a lot of work with brass engraving, and the ultra-fine details they are able to create made them the ideal people to talk to about creating more precise velvet rods. I worked with Andrea Grimm to make a set of velvet rods that would work for the test sample of velvet I’m preparing to weave.
setting the rods
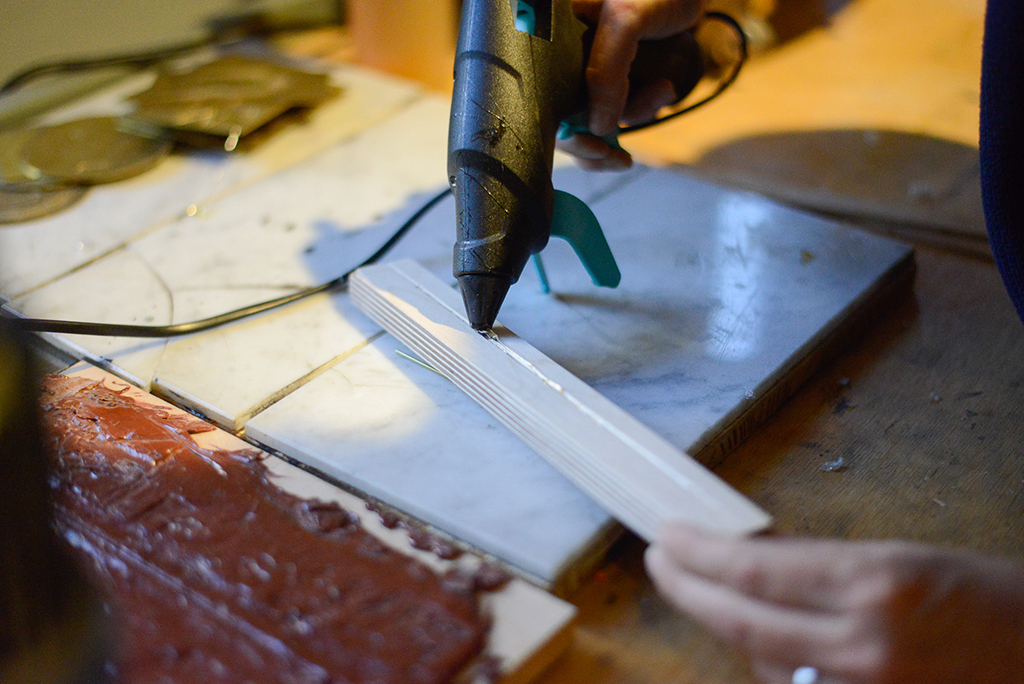
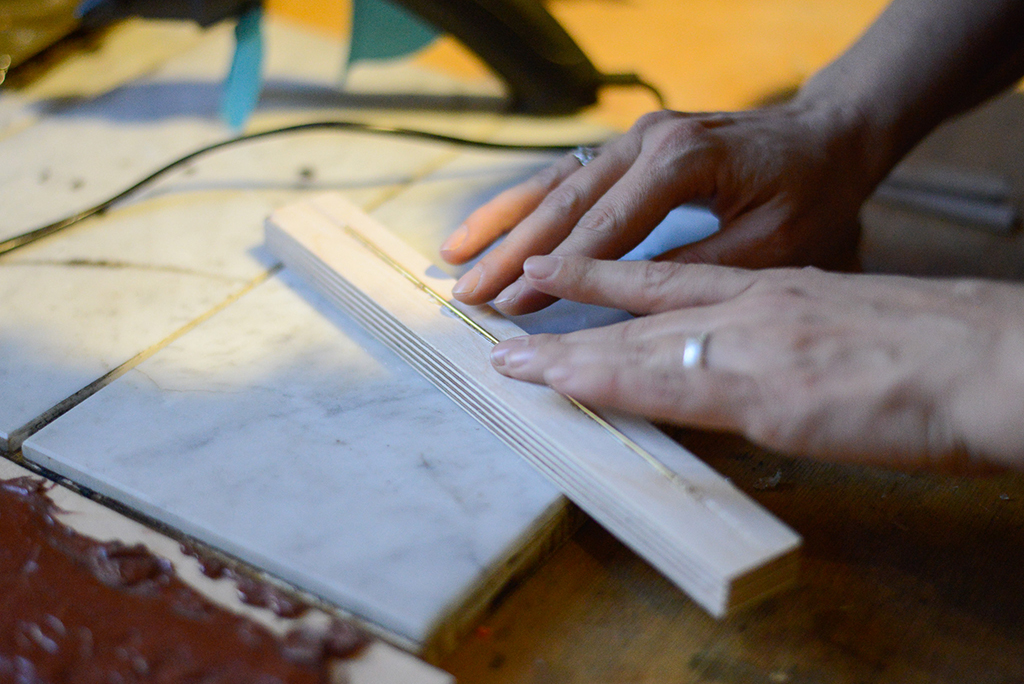
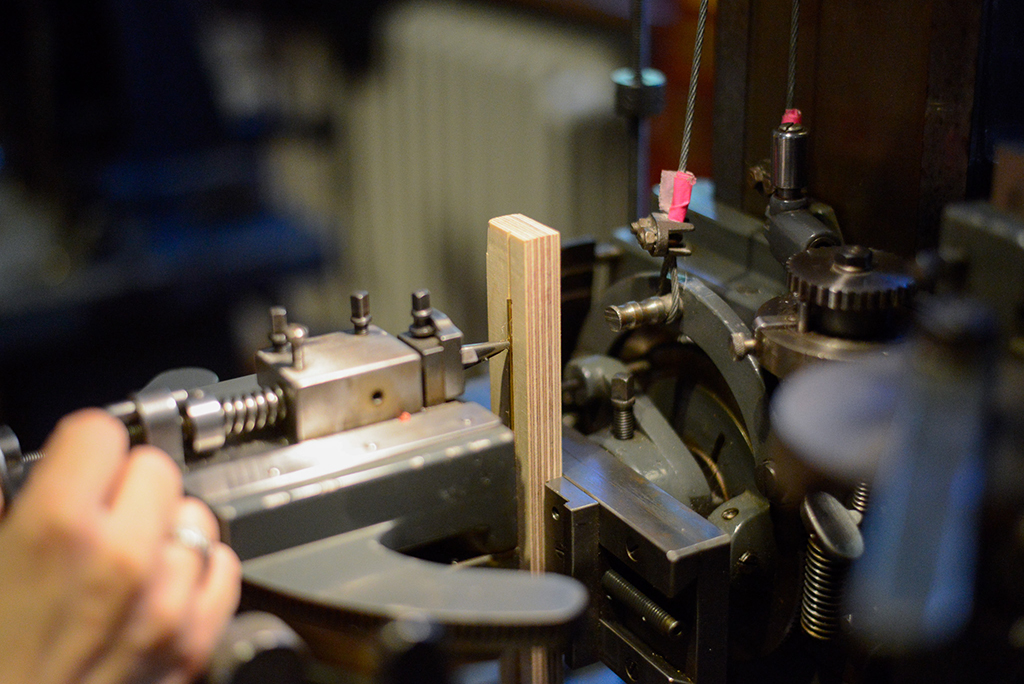
Brass is an ideal material for the velvet rods because it is soft enough to easily cut the guiding groove, which should deepen with time, making the velvet cuts easier and easier – like an engraved patina. The downside, however, is that this softness also makes thin brass rods (in this instance, 2mm in diameter) easily bendable. In order to hold them in place, I made a wooden jig using my router and Andrea fixed the rods in place using hot glue.
The test rods are 18cm in length, as the test velvet will measure no more than 15cm in width. The system developed with Andrea would need to be adaptable up to a maximum width of 70cm, so discussions about how the Goldschmiede machines could be adapted to this are still ongoing.
cutting the rods
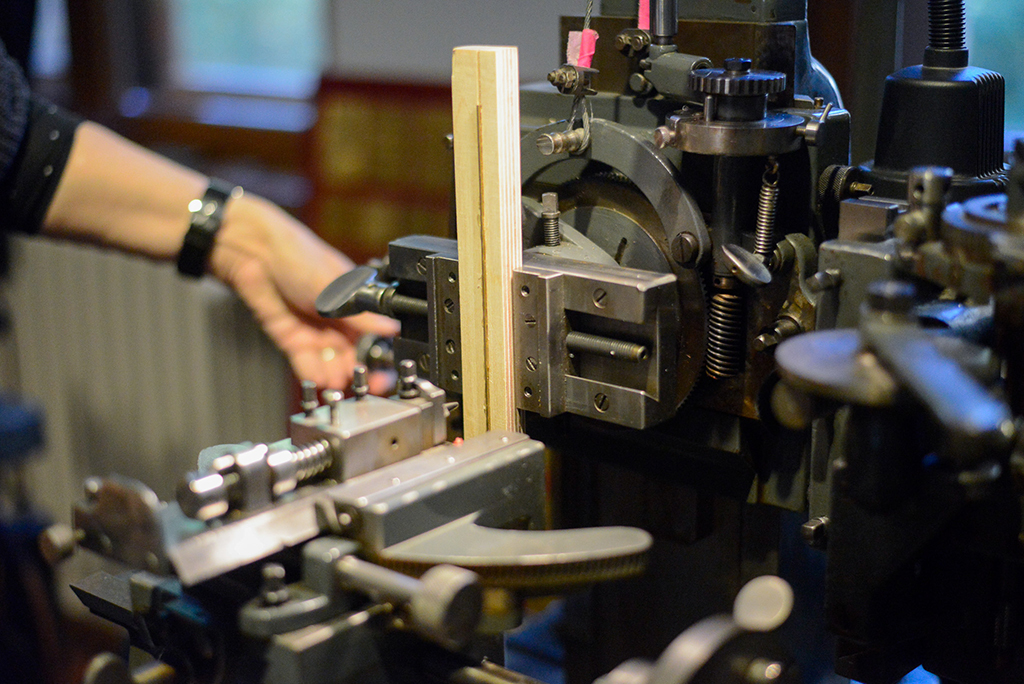
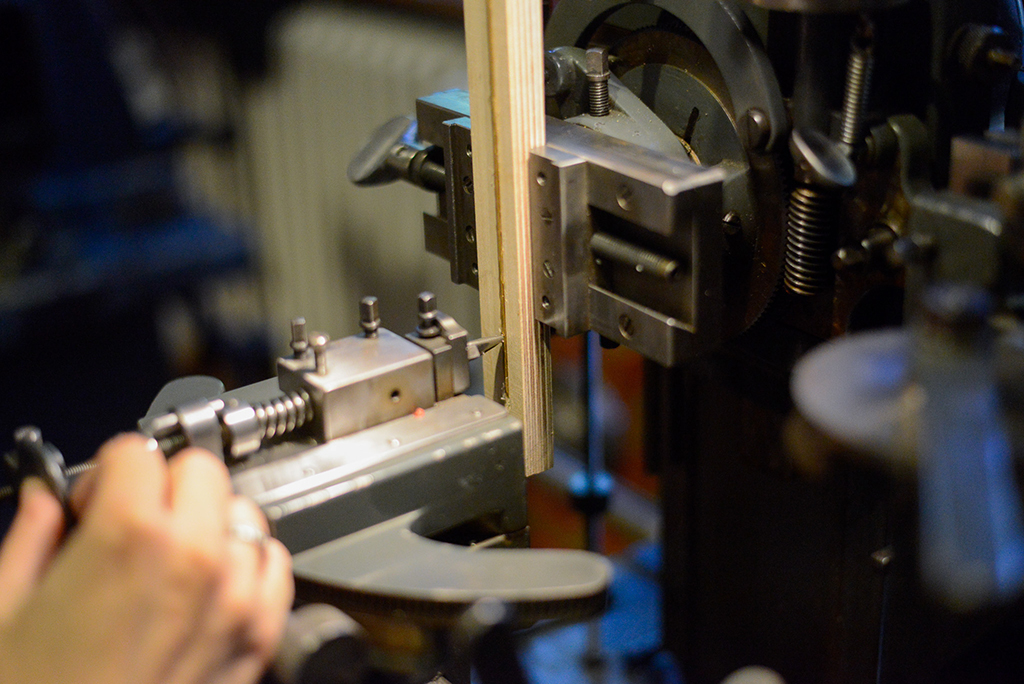
Andrea fixed the jig into one of the hand-operated mechanical engravers, and ran a few test passes to ensure the rod was entirely straight. She had already narrowed and sharpened the cutting tool to make sure it would cut a fine enough groove. Andrea then passed the cutter along the rod roughly four times, until the cut was deep and stable enough to use.
")
In total Andrea carved six rods, which should be enough to weave test velvet. The grooves are consistent and strong, although not overly-deep, and a scalpel blade runs smoothly across them.

The next step is winding the test bobbins with silk, and then finding and attaching weights to each one. Weaving time is slowly approaching…
Datenschutzerklärung — Impressum
©Emma Wood 2025